| Dragon 1/72 Dornier Do 335A-0 |
| |
 |
|
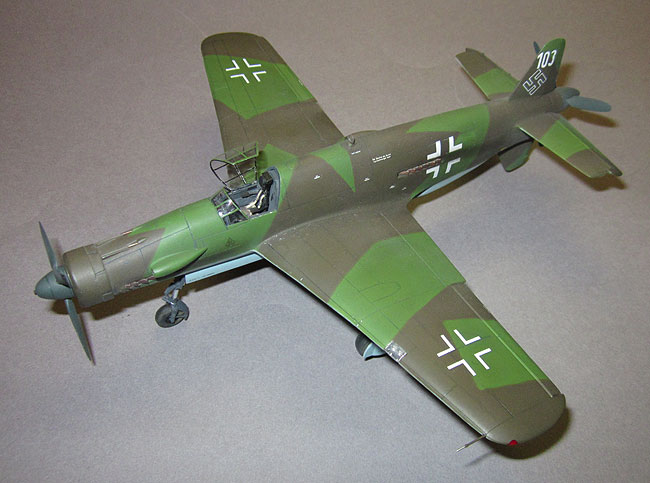
| I must admit I really can't see what all the hoopla is about
the Luftwaffe. After all, they lost. The Fw 190 is okay, sort of, I guess.
The Bf 109 doesn't do much for me, though I suppose I will add one or two
to the collection eventually, most likely in Finnish markings. I do however
like the weird and wonderful, experimentals, prototypes and pre-production
aircraft - and the just plain bizarre. The Do 335 certainly falls into more
than one of those categories so I'm more than happy to invite it in out
of the cold, despite its fascist leanings. |
| |
 |
|
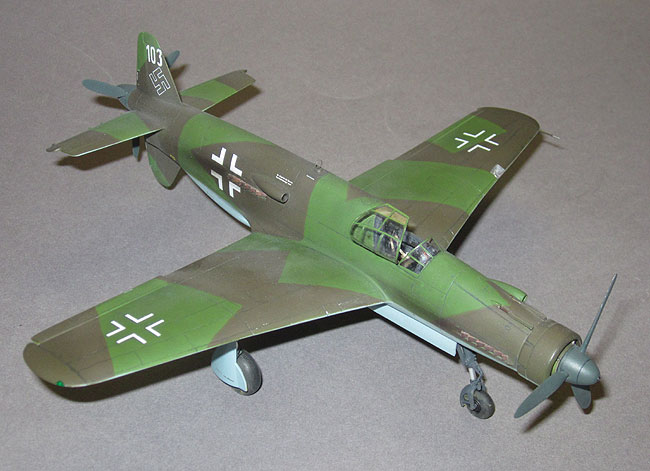
| The Dragon kit has a reputation for being ill-fitting and
in truth it does require some care to build, however with a lot of test
fitting and pre-planning to identify the danger spots it goes together reasonably
well. Most of the fit problems I had were of my own doing as a result of
modifications and extra detailing. A few after market bits were used and
abused, mainly the Eduard etched set, Falcon canopy and the superb Moskit
exhausts, sadly no longer available. See construction
page for details. |
| |
 |
|
| My main references on the type were the Monogram Aviation
Publications book by Richard Smith, Eddie Creek and Thomas Hitchcock and
the Classic book by Mssrs. Creek and Smith again but with Gerhard Roletschek
standing in for Herr Hitchcock. Clearly these guys are far more interested
in planes with crosses on than I am so I took their word when it came to
painting. I really don't want to get embroiled in the whole Luftwaffe paint
thing, suffice to say everyone seems to have a different interpretation
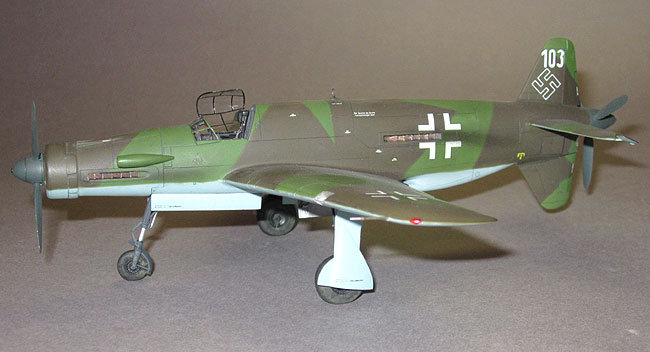
of how the colours "should" look. I used Polly Scale paints for
the main camouflage colours which, I'm told, are RLM 81 Brown-Violet and
RLM 82 Bright Green on top with RLM 76 Light Blue on the bottom. Seemples
you say, and you would be right, except that Polly Scale has deemed RLM
82 to be Dark Green, RLM 83 Light Green, RLM 76 to be Light Gray and RLM
78 to be Light Blue. To further complicate matters, Testors Model Master
doesn't have an RLM 82 in its range but it does have RLM 80 which is Olivgrun
and they say RLM 78 is Hellblau and RLM 76 is Lichtblau. According to Google
translate, Hellblau is German for Light Blue, and Lichtblau is German for...
you guessed it, Light Blue. Confused? Oh good, it's not just me then. In
the end I went with the descriptions and ignored the RLM references, finishing
it in Brown-Violet, Bright (or Light) Green and Light (or... Light) Blue.
The green I thought ended up a bit too bright, so I oversprayed
this with a couple of thin coats of Gunze Smoke which toned it down nicely.
|
| |
 |
|
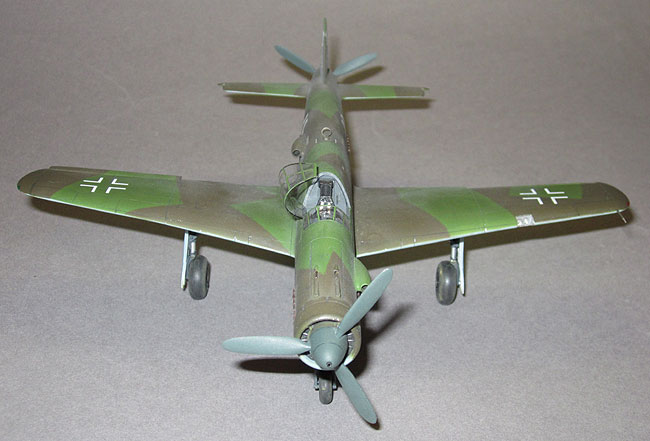
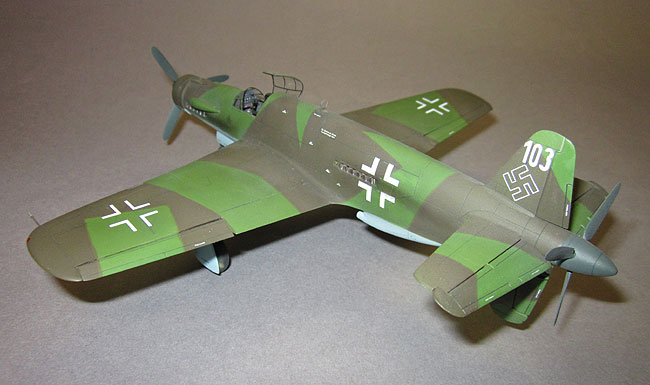
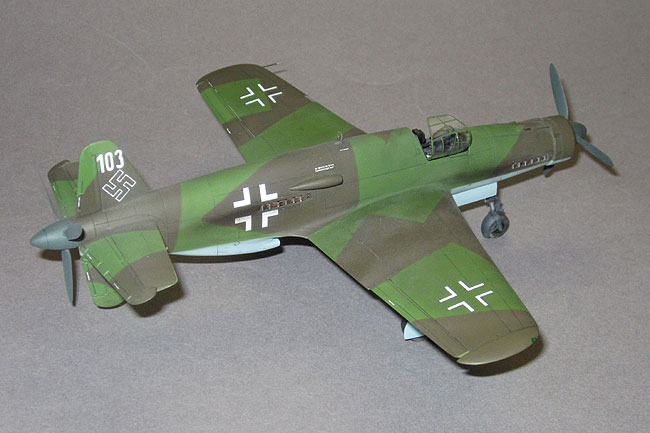
| I kept weathering to a minimum since these were pre-production
aircraft and didn't get a lot of flight time, though 103 in particular looked
to be in pretty poor shape by the time it was found by US troops. A few
paint chips around the cockpit and wing leading edges, some exhaust stains
and a bit of mud on the tires were all I added. I used the new(ish) Humbrol
weathering powders for the mud and their Blue/Grey wash for the panel lines
and I must say I was impressed with how well they worked. I also used a
dash of their Smoke Grey weathering powder mixed with Gunze Clear Flat for
the exhaust stains and this was very effective. |
| |
 |
|
Decals came from various sources. The kit decals were thick
and very off-white so they were not used with the exception of a few of
the stencils. Swastikas came from an Xtradecal sheet, upper wing Balkenkreuze
are Aeromaster, lower wings from the spare decal box and fuselage crosses
from Techmod. The latter are beautifully thin, opaque - and completely resistant
to any decal setting solvent in the known universe. Even DACOs strong solution
wouldn't touch them, and that stuff could soften concrete if given half
a chance. Much slicing over panel lines and pressing down with dampened
cloths ensued until eventually the durn things looked okay.
The tail numbers had me stumped for a bit. Originally I was going to do
aircraft 107, until I realised, too late of course, that this aircraft had
the d/f loop on the bottom instead of the top, as did my second choice,
105. This would have meant major surgery to remove the mount and relocate
it. With the model fully painted and well into the decal stage this was
not an option I wanted to explore any further. I could have, and should
have done 102, but everyone does that one and I wanted something a bit different.
I settled on 103 which had the required dorsal location of the d/f loop,
but there was a problem; the "3" was a very unique style and nowhere
in my vast collection of decals could I find anything even remotely resembling
it. After much searching through ye olde decal box I eventually found a
partial sheet that had come from an old Revell issue of the Do 335, which
I'm guessing was the Matchbox kit in a Revell box. Strange that it should
be in my collection because I've never built that kit, I can only assume
it came from some decal scraps given to me by someone else. On this sheet
were tail markings for 102, 105 and 112, the latter being a two seater.
By cutting off the top of a 2 and combining it with the bottom of a 5 I
managed to produce a fairly reasonable facsimile of the odd looking number
3. In this case, 2 + 5 = 3; proof positive that math is definitely not my
strongest subject! |
| |
 |
|
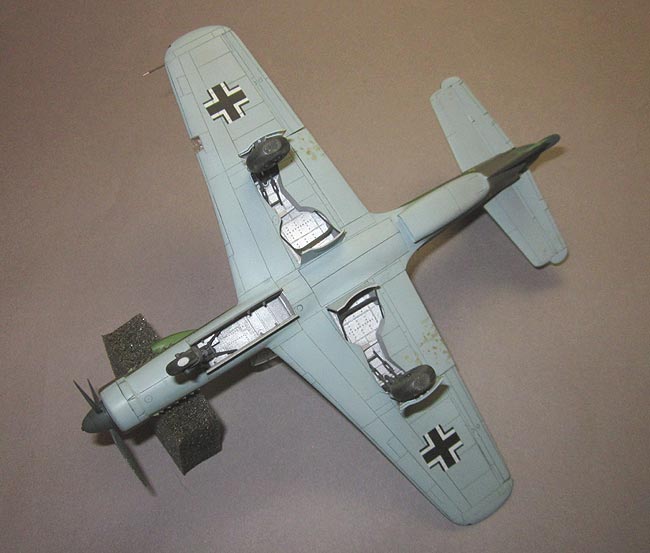
Dragon provides semi-complete wheel wells out of the box.
The side walls are moulded as part of the lower wing, however they are only
half the depth of the well, leaving large open spaces all around. I finished
these off with sheet plastic cut and shaped to fit around the openings and
closing off the gaps. Similarly, the nose wheel well has large gaps on the
sides because the seperate well is not deep enough to meet the fuselage
halves. These were closed off with .005" sheet which was sanded flush
with the outer edges of the wheel well opening.
The landing light cover was a solid block of clear plastic with two half-depth
holes in the back to simulate the landing lights. This made for an excellent
representation of a solid block of clear plastic with two holes in it, but
not such a good job at representing a clear landing light cover with two
lights behind it. I vacformed the cover in .010" acetate using the
solid lump as a form, boxed in the opening in the wing and drilled two shallow
holes to take MV Products lenses. Me likey more. |
| |
 |
|
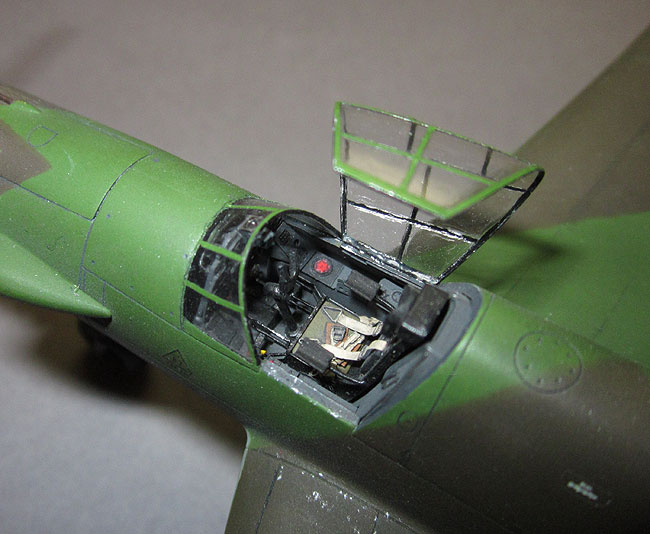
| The Eduard etched set provides instrument panel, sidewalls
and consoles, seat belts, foot rests, rudder pedals and other sundry bits
and pieces. Finished off with Falcon's always excellent vacform canopies
that fit like a, well... a really nicely fitting vacform canopy. Strange.
Canopy framing is mostly painted decal strips with the edges of the windscreen
being masked and painted. Revi 16B gunsight is from Quickboost. |
| |
 |
|
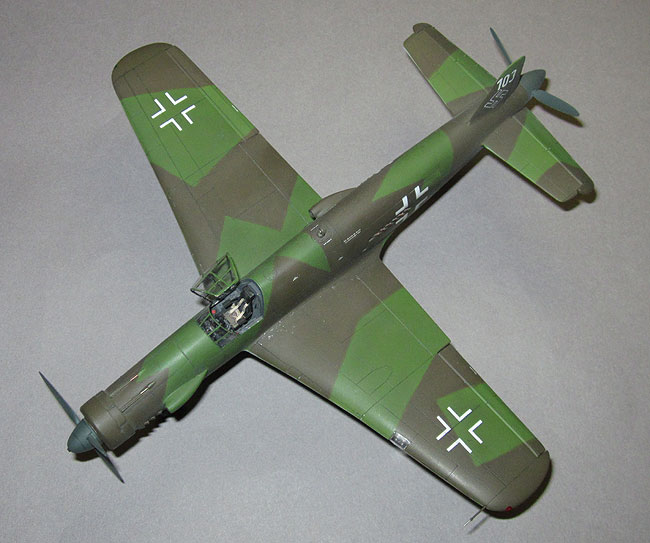
| All control surfaces were seperated, extensively re-worked
(especially the ailerons, which are about 3 scale inches thick at the trailing
edge), cast in resin and then attached in offset positions. The resin pieces
will soon be available under my own brand, Thunderbird
Models. This will also save me a lot of work if I ever get
around to building the two other Dragon Do 335s (the heavily armed B-2 and
the two seat A-12) I have in the "to do" pile. You know, that
pile that mocks me every time I look at it because it knows full well I'll
never live long enough to even make a dent in it, unless of course modern
science finds a cure for death, bad eyesight, fumbling fingers and general
mental decrepitude. |
| |
 |
|
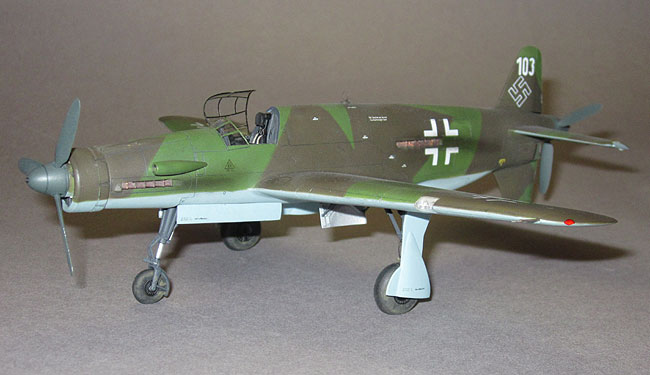
| I did make one fairly serious error and, as usual, discovered
it far too late to do anything about it without causing major destruction.
Being rather pre-occupied with finding an aircraft that had the d/f loop
in the right place, I somehow completely missed the fact that aircraft 103
was not armed! There should be no channels or bulges for the machine guns
on the upper cowling and no cannon muzzle sticking out of the spinner. So
despite the fact that I don't do "what if" or Luft '46 subjects,
I've ended up with one anyway. Oh well, I'll try not to lose sleep over
it. |
| |
 |
|
| |
|
| |


